Wednesday, August 19, 2009

Like Peeling an Onion, Without the Crying


The only way to really learn anything is to jump right in, get your hands dirty and make a lot of mistakes before you settle into a groove. Then of course, once you think you've got it figured out, the target shifts again and additional challenges arise. That's really what keeps life interesting, though, right?

It's like peeling an onion, since there's always another layer of complexity. But sometimes I learn something that's downright humbling, embarrassing even.

Earlier this week, at a winter gardening class taught by Cynthia Sandberg -- a.k.a. Love Apple Farm in Ben Lomond -- I learned among other things that "winter squash" is not grown in the winter. (I highly recommend Cynthia's gardening and backyard chicken classes, and eventually I'd like to take her beekeeping and tomato classes as well.)

If you already knew this, feel free to laugh. I should have listened to my mother-in-law, who suggested I plant my butternut squash in early summer (I started the seeds in mid to late July. You were right, Denice!). They got pulled up and fed to the chickens right after I got home, so at least they got eaten, and now I won't be wasting valuable time or resources.

And though I won't get that big crop of luscious, deep-orange butternuts for soups, curries and pies, Cynthia sent us each home with a flat (8 six-packs) of new veggies. I really got giddy when they started passing around the pack of purple cauliflower and onions, but here's the list, linking to randomly Googled images:

(1) Purple Cauliflower
(2) Pak Choi
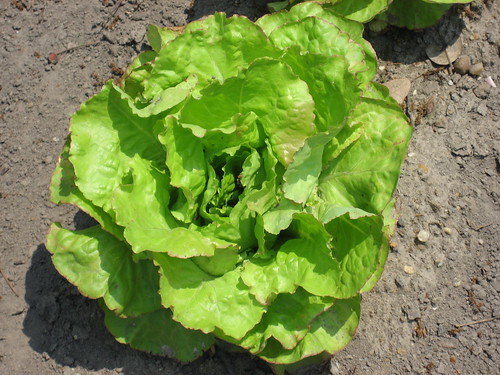
(3) Butter Crunch Lettuce
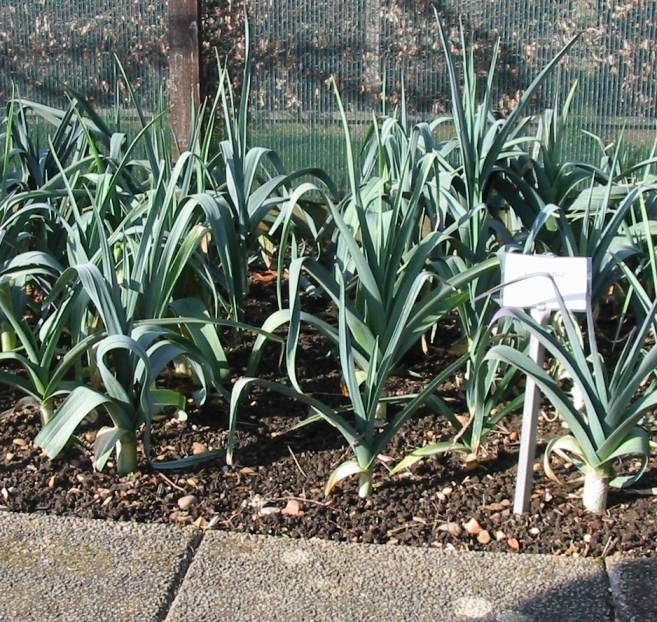
(4) Leeks
(5) White Portugal Onion

I'm particularly stoked about the onions, and now I just have a lot more options for the garden as a whole. Plus, I'll use three Earth Boxes for garlic and shallots, just as soon as their summer tenants (tomato, eggplant, cucumber) have expired. So that's the plan at this point.

This weekend I'll direct-seed some more red and golden beets and do it in a way that will extend the harvest. Ditto for carrots, lettuce, spinach and kale. I also need to build some pieces of PVC piping into the insides of the beds, so I can bend smaller-gauge piping into hoops that support frost cloth or bird netting.

A few tiny beets are really taking to their home in Simmy's garden (in the picture above). She also has about eight shelling pea plants curling their wiry little bodies toward the tomato cage planted in the middle. She loved her eggplant again (this time served with spinach, garbanzo beans, cooked in a tomato sauce with lots of rich Indian spices and minced ginger).

Peace.

-s

Tuesday, August 11, 2009

I'll be Back Soon...

Just in time for a visit from family, I'm feeling under the weather... I've still been cooking, but don't have enough energy to do my regular postings. But I wanted to let all my adoring fans (right!) know that I haven't flaked out. Eat well and I'll see y'all soon.

-s

Saturday, August 8, 2009

Cashew Coconut "Crack" Rice

This has become a staple around here, since the girls really like it and just about everything can be found in the bulk dry goods section of the store (only the ginger and butter are perishable, and can be replaced if necessary with powdered ginger and/or oil). It's a simpler version of a recipe I made from Chandra Padmanabhan's Dakshin: Vegetarian Cuisine from South India ("Coconut Rice," pg. 66) only not quite so complex.

The name "crack rice" was given to this dish by some friends of ours who I guess loved it in an addictive, gotta-have-more kind of a way (the combination of the sweetness of the raisins, the richness of the butter/ghee and the crispy fried coconut and cashew make it the perfect late night pig-out food). So the name stuck, unfortunately, although I take it as a compliment.

The cast of characters:

4 C cooked rice (we use a combination of white and brown basmati)
3-4 Tb ghee or butter/oil combination
1/2 Tb mustard seeds (brown or black)
1 Tb minced fresh ginger (or about 1tsp powdered)
3/4 C raw cashews
3/4 C shredded coconut
1/2 C raisins
salt (taste)
chopped cilantro (about a handful), for garnish

The script:

Heat the ghee or butter/oil combination in a pan on medium heat, add cashews when hot and turn them until golden brown and crisp (some of mine in the picture above are slightly burnt, which I try to avoid but it's not a big deal), then remove them from the oil with a slotted spoon and set aside.

Add the coconut, scraping and turning until it also is golden brown. I usually don't remove the coconut with the slotted spoon just because it's a hassle but it does give the dish a better texture. Add the ginger and mustard seeds until the seeds turn grey and the ginger is sauteed.

Add the rice and thoroughly coat it with the oil and ginger/mustard seed mixture (and coconut, if you left it in the pan), scraping the bottom with your spatula to make sure it doesn't stay stuck on the bottom.

Remove from heat, mix in the raisins and cashews (and coconut, if removed earlier), salt to taste and serve. Garnish with cilantro.

This is great served with a light split pea soup.

-s

Friday, August 7, 2009

Nothing Like Homemade Ice Cream


For such a decadent dessert, it doesn't get much simpler than French vanilla ice cream (and fresh, ripe strawberries are an added bonus). But give yourself some time to get the custard just right -- there's an art to bringing it all together to the perfect temperature so that it thickens to almost a pudding-like consistency. Just about everything else, your fruit, fudge, nuts or whatever you feel like adding, is thrown in once the custard is cool anyway (well, chocolate requires a few steps in the cooking process).

We use (get ready for an unpaid product plug) a Cuisinart ICE-20 automatic cream maker, which retails for $50 (but we found lightly used for half that on Craigslist). It was actually purchased as a money saver, since we knew we'd eat a lot of ice cream on these hot summer afternoons and wouldn't settle for crap (yeah, we're ice cream snobs). The ingredients are ridiculously simple and few.

For the recipe, I refer to a combination of Bittman's HTCE (it's not in the vegetarian edition) and the instruction booklet that came with the ice cream maker, which I downloaded. I may alter my technique down the road, but this works:

3 cups half-n-half (a blend of milk and cream is fine, but keep the fat!)
1 1/2 tsp vanilla extract (have yet to try it with a whole vanilla bean)
2 large eggs
3 large egg yolks
3/4 cup sugar

Put cream and vanilla extract in medium saucepan on medium low. Cook, stirring occasionally, until it steams. At that point, remove it from the heat.

While the cream is heating up, beat the eggs and yolks with the sugar (I've been doing it by hand whisk, but would like an electric mixer) until it's somewhat whipped and light yellow in color. Slowly pour about a cup of the hot cream into the egg/sugar mixture while working it in with a wooden (or whatever) spoon.

Then add the mixture to the rest of the heated cream, return to heat at medium low and stir constantly until it's nice and thick. This is where it takes patience, practice and luck to get the perfect custard consistency. It might take five to 10 minutes but really is ready when it feels ready.

Remove from heat, pour into a bowl and cover, refrigerate until cool and keep for up to a day. When you're ready for ice cream (uh, always?) just pour it into the machine and wait. Best eaten right away, then it gets a little icy and hard but still good stored in the freezer.

We've been getting so many strawberries since spring that it's just a good way to use them before they get funky, but it's also the best strawberry ice cream I've ever had. I also was never a fan of chocolate ice cream but was converted after making it at home with some expensive chocolate, still cheaper than buying a pre-made quart. It's all about being so fresh, and Bittman says this is why ice cream is so incredible at some of the nicer restaurants.

Almost forgot -- slice about two cups of strawberries (probably the same for any fresh berry) somewhat thinly, add about 1/4 cup sugar and about two tablespoons of fresh lemon juice, mix thoroughly and set aside for at least two hours. Add it to the cooled custard before using.

If you happen to live in blackberry country, I'm sure they'd be awesome in ice cream.

-s

Thursday, August 6, 2009

"I Love It!"


Very rarely does Simone say that about something on the dinner table, even if she really does love it. She might really get into lettuce or other things otherwise rejected or she may slide a plate of her favorite food across the table with a grimace (gee, thanks), but "I love it" is saved for something truly extraordinary.

It's nothing complex, just sauteed fresh tomato and eggplant, a splash of olive oil at the end, salt and pepper. The veggies have to be fresh and in-season (these were picked from our container garden earlier today), since this really brings out the flavors of the two summer fruits. The tomatoes caramelize and release a wonderful sweetness and, with the eggplant, the final product turns into something way more than the sum of its ingredients.

She asked for more after cleaning her plate (even ignoring the Tofurkey Italian sausage she usually crams into her pie hole) and then started eating from our plates until it was all gone -- her hands, arms and face covered in a thick oily film.

All you do is chop up the tomato and eggplant, about equal parts (and figure losing about 1/3 of its volume when cooked down), into bite-sized chunks. Heat up a pan with neutral oil (grapeseed if you have it, but canola is fine) to medium and drop in the tomato/eggplant chunks.

Cook until they start to break down, adding salt and pepper (to taste) as they soften. After seven or so minutes, they should be about ready (check the eggplant with a fork to make sure it's tender). Remove from heat, add a good amount of extra virgin olive oil, stir and serve.

Great with a batch of fettuccine (best fresh, if you have eggs, flour and a pasta machine) and a salad. We often serve it with the soy sausage mentioned above but we're trying to lay off soy more .

Enjoy.

-s

Waiting...

Good cooking begins with fresh ingredients, preferably organic (much more than just a marketable label), which is one of the reasons we decided to put up a garden in our new home. I feel like I know more about gardening than I actually do -- I read several books, did a ton of online research, visited other people's gardens and solicited advice -- but I'm preparing for a humbling first run.

We've grown in containers (mostly tomatoes, eggplant, herbs), but this year's winter garden is intended to replace the CSA farm share once we start harvesting in late fall and throughout the winter. We currently get fresh eggs from our CSA, but will begin getting even fresher eggs from our four hens sometime in October.

In addition to the three 7'x4' raised beds you see pictured, I also built a smaller 4'x5' for my daughter Simone. Her shelling peas are now in the ground and doing quite well, to be joined soon by red and golden beets, two kinds of carrots and a winter squash named "fairy" squash (she loves the name) that's similar to butternut but smaller. I'm trying to figure out some better ways to get Simone involved in her garden (she's only 2 and 1/2 years old), and so far she's been watering her peas and checking the progress of her other seedlings (still in flats).

So here's the rundown on what we're growing this winter (we're Zone 8, some frost but mostly mild):

(1) Beet: Early Wonder, Golden
(2) Broccoli: Belstar
(3) Brussels Sprouts: Roodnerf
(4) Carrot: Purple Haze (yes, they're purple), Nelson
(5) Kale: Winter Red
(6) Lettuce: Provencal Winter Mix (high-protein loose leaf variety), Romulus (a Romaine type)
(7) Parsnip: Javelin
(8) Pea: Dakota (shelling), Oregon Sugar Pod
(9) Spinach: Olympia, Tyee
(10) Squash: Fairy, Butternut

Besides Simone's garden, I've started the broccoli, brussels sprouts and butternut squash (I have way too many seedlings of all three) in flats. I'll give updates throughout the growing season, and of course you'll begin to see these veggies show up on the dinner table before too long!

Adios.

-s

Wednesday, August 5, 2009

Thanks for finding me!

I started really learning how to cook during the last time I was unemployed, so at least I'd have dinner ready for my wife when she came home from a long day at work as a high school teacher. I figured it was the least I could do after spending about 30 minutes scanning the job boards in the morning and then spending the rest of the day surfing, biking or lounging in the hammock with a good book.

It was intimidating at first, especially since we tend to like Indian, Thai and similarly complex cuisines. I'll be honest -- some of the early experiments just sucked. But with patience (that's your best friend in many corners of life, but especially cooking), a nice variety of cook books and fresh, quality ingredients, I started to turn a corner.

After discovering Mark Bittman's How to Cook Everything, though, the kitchen really started to get worked over. If you have one cookbook in your home kitchen, it should be that or Bittman's exhaustive How to Cook Everything Vegetarian. I plan on referring to both of those books often, and will simply abbreviate in reference: HTCE, HTCEV or just Bittman.

You'll see both successes and failures, gourmet and super-simple, while adhering to a vegetarian ingredient list (some vegan, but not strictly so -- I love butter and cheese, and we'll be getting eggs from our four hens once they're old enough, in October). What you won't find are processed foods, microwave directions or anything that takes the dignity or heartiness out of food. I think my ideas of food and good eating are very similar in scope to those expressed by Michael Pollan's important In Defense of Food.

And being a recession and all (we're tightening the belt ourselves), I'll try to highlight ways to save money without sacrificing the pleasure of a good meal. But it's important to point out that saving money sometimes costs more time -- so that's an important consideration (if you're unemployed, you have time, but it's also about kitchen management and efficient prep).

This evening we had a traditional Chinese-style fried rice, with Napa cabbage, green beans, green peppers and eggs. Now it's time to read some bedtime stories. Please come back and see me again soon.